
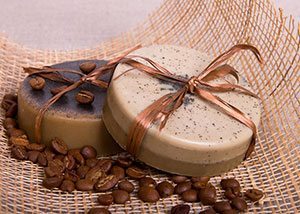
Soap-making is an addictive, crafty way to pass an afternoon, but it’s also something that’s becoming increasingly important for people who want to know what is going into their skin care products. And what better way to monitor that than to make soap at home! While this used to be a commonplace activity, after 1916 pharmacies made things much easier for households by selling ready-made soaps in all shapes and sizes. But today, with the increased concern with taking a more natural and sustainable approach to life, and also a strong culture of ‘makers’ and DIYers of all kinds, it’s swinging back the other way.
There are a few ways to tackle the soap-making process and they range from the no-fuss method of “melt and pour” – which is basically melting down old soaps and pouring the mixture into new moulds – to a “cold process” which is making soap from scratch and letting it cure for at least a month. If you don’t have a month up your sleeve, the best way to feel like you are really making something from scratch – without the lengthy time period – is to follow a “hot process” recipe.
Ingredients
Base Fats and Oils: The type of ingredients you use will depend on the type of soap you would like to make. There are some fantastic recipes out there on the net like one for a richly lathering coconut oil soap, a chai latte bar or soap that can be used as shampoo. You can also base your recipe around what you may already have in the cupboard such as vegetable and olive oil.
Lye: Once you decide on which oils you would like to use, then you will need to buy lye, which is basically caustic soda (sodium hydroxide) and is the ingredient that causes the chemical reaction in the fats and oils changing it to soap. You can get this online from soap-making websites, or at some pharmacies. If using this chemical at home frightens you, the alternative is to use a glycerin soap base, or melt down existing soaps instead.
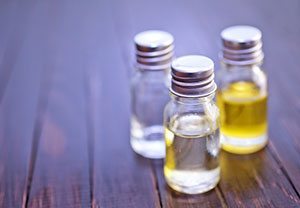
Fragrance/essential oils: to give your soap character, perfume and beneficial properties, add any essential oils like lavender, rosemary and bergamot or fruity fragrances like lemon, orange or grapefruit.
Using Lye
If you do decide to use this chemical, remember these important points:
- Buy gloves
- Wear safety goggles
- Only use a stove with a good extraction fan
- Never allow it to touch skin as it will burn
- Only use a stainless steel pot – don’t use aluminium or anything with a non-stick surface
Tools
So, once you’ve got the ingredients sorted, here are the tools you will need for your soap making adventure:
- Safety gear (as mentioned above)
- 2x stainless steel pots
- Scales
- Stick blender
- 2x thermometers
- Plastic moulds (or any ordinary baking tin lined with baking paper)
Recipe
The ratio of fats and oils to lye will depend on the ingredients you have chosen. It’s best to find a recipe and follow it carefully. Each combination of oils and lye will have a different saponification index, which means that when all these ingredients are combined at the right temperatures, they will harden into soap. There are handy ‘lye calculators’ online for this very reason.
An Example Recipe:
Here’s a simple recipe for soap made up of ingredients you may have already lying around. You’ll notice the scales will come in handy as these amounts are based upon percentages:
- Coconut oil – 414g – 30%
- Olive oil – 388g – 28%
- Lard/butter – 332g – 24%
- Almond oil – 110.5g – 8%
- Castor oil – 68g – 5%
- Cocoa butter – 69g – 5%
- Lye – 193g – 6%
- Water – 482g
Fragrance or essential oil – 56g
Method:
- Get your two pots on the stove – one for the lye and water, the other to melt your hard fats and oils.
- Measure out your oils and fats on the scales. Once your hard oils are melted, add any liquid oils to the pot.
- Slowly pour the lye solution into the melted fats and oils, mixing as you go.
- Give it a few bursts with the stick blender. Once the soap has come to trace (when you dribble a bit of mixture back onto the top of your pot and you can see a trace, i.e. it doesn’t immediately mix back in with the rest) it’s ready for saponification.
- Cook the mixture on low checking and stirring it every 15 minutes.
- It will come to a gel stage at about 30 minutes where the oils will start to separate around the edges of the pot. Mix this back in and keep cooking.
- When it is uniformly light and fluffy (like a heavier version of pancake batter) after about 50 minutes (depending on your ingredients), and at about 180 degree Celsius, take it off the heat. You’re ready to add your essential oils and colourants. If adding non-liquid colourants, add a bit of olive oil first to make it easier to mix in.
- Using a spatula, spoon the mixture into your mould and slam it down on a hard bench a few times to remove all air pockets.
- Set it aside for 1-2 days until it’s hard enough to cut.
- Once cut, your soap is ready and safe to use as the saponification process was completed during the extra cooking. However, as with cold process soap, letting it cure for a couple of weeks can’t hurt if you have the time!
Once again, the important thing to remember is when working with lye, check your recipe percentages and saponification index online. This will take any guesswork out of the equation and will be a safer process overall. And once you’ve made your first batch, each subsequent batch will become easier and you’ll wonder why you ever spent money on a chemical-riddled shower gel!